
 Pin it
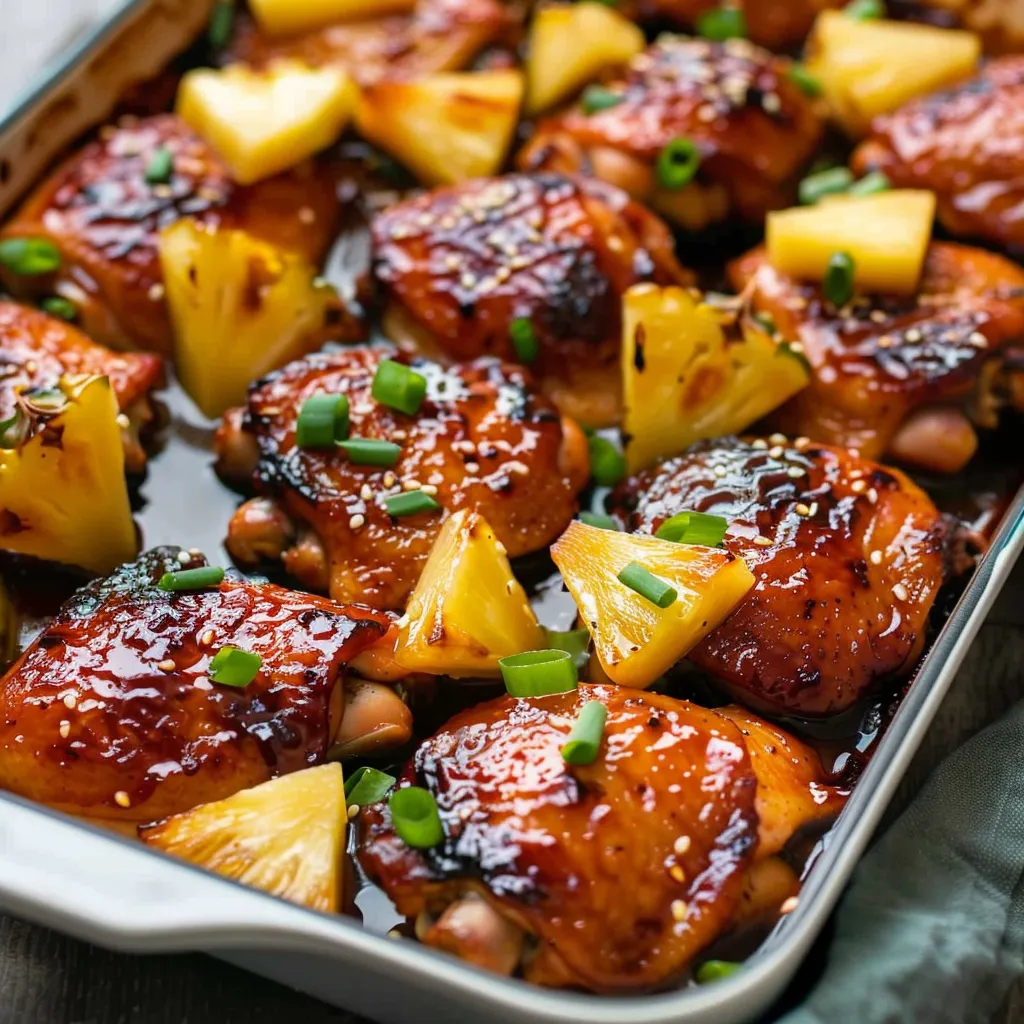
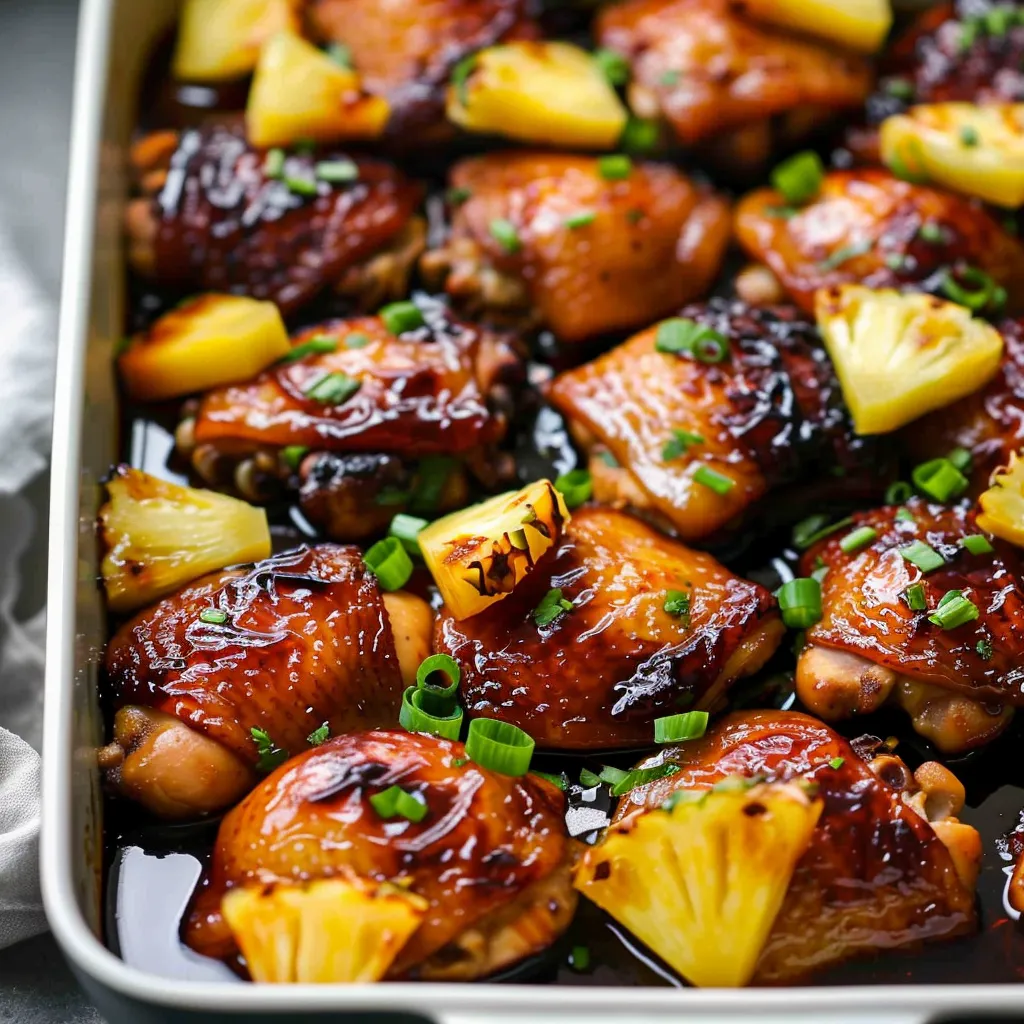
This succulent Baked Huli Huli Chicken transforms ordinary chicken thighs into a Hawaiian-inspired feast that will transport your taste buds straight to the islands. The sticky sweet and savory glaze caramelizes perfectly in the oven, creating an irresistible dish that's both impressive and simple to prepare.
I first made this dish for a backyard gathering when rain threatened our grilling plans. The oven method was so successful that it has completely replaced our traditional grilled version even on sunny days.
Ingredients
- Chicken thighs: bone in and skin on for maximum flavor and juiciness. The fat renders beautifully during baking.
- Pineapple juice: provides natural sweetness and tenderizing enzymes that work magic on the chicken.
- Soy sauce: adds that umami depth that makes this dish irresistible. Use low sodium if you prefer.
- Brown sugar: creates the caramelized exterior that defines Huli Huli chicken. Dark brown provides more molasses notes.
- Ketchup: adds tomato tang and helps thicken the sauce naturally.
- Chicken broth: adds savory notes that balance the sweetness perfectly.
- Fresh ginger: brings zippy warmth that cuts through the richness. Always use fresh for best flavor.
- Garlic cloves: provide essential aromatic foundation. Freshly minced makes all the difference.
- Sesame oil: contributes nutty undertones that elevate the entire dish.
- Cornstarch: creates that perfect sticky glaze that clings to every bite.
Step-by-Step Instructions
- Prep and arrange:
- Position your chicken thighs skin side up in a single layer in your baking dish. Make sure to use a dish with enough depth to contain the sauce without overflow during baking. Pat the chicken dry first for better sauce adhesion.
- Create the sauce base:
- Combine your pineapple juice, soy sauce, brown sugar, ketchup, chicken broth, ginger, garlic, and sesame oil in a saucepan over medium heat. Whisk everything together until the sugar fully dissolves before allowing it to reach a gentle boil. This initial heating helps marry the flavors together.
- Simmer and develop:
- Allow the sauce to gently bubble for a full 10 minutes, stirring occasionally to prevent any scorching. During this time, the sauce will reduce slightly and the raw taste of garlic and ginger will mellow into something more complex and aromatic.
- Thicken the sauce:
- Create your cornstarch slurry by whisking the cornstarch and water together until completely smooth. The key here is adding this mixture in a slow stream while constantly whisking the hot sauce. This prevents lumps and ensures even thickening throughout.
- Coat the chicken:
- Pour your glossy sauce over the chicken thighs, making sure to coat each piece thoroughly. Use a spoon to scoop sauce over any spots that might have been missed. The sauce should cover about halfway up the sides of the chicken.
- Bake to perfection:
- Place your baking dish in the preheated oven and let it work its magic for 45 minutes to an hour. The exact timing depends on the size of your chicken thighs. Remember to baste halfway through cooking, spooning that incredible sauce over the chicken to build up layers of flavor.
- Rest before serving:
- Allow the finished dish to rest for 5 minutes after removing from the oven. This gives the juices time to redistribute throughout the meat and the sauce slightly thickens further as it cools.
 Pin it
The fresh ginger is truly the secret ingredient in this recipe. I once tried substituting powdered ginger when I was in a pinch, and while the dish was still good, it lacked that vibrant zing that makes authentic Huli Huli chicken so special. I now keep ginger root in my freezer so I never run out.
Make Ahead Options
This recipe works beautifully as a make ahead meal. You can prepare the sauce and marinate the chicken up to 24 hours in advance. Simply pour the cooled sauce over the chicken in an airtight container and refrigerate. The longer it marinates, the more flavorful it becomes. When ready to cook, transfer everything to your baking dish and proceed with the recipe as written.
Authentic Hawaiian Connection
Traditional Huli Huli chicken gets its name from the Hawaiian word "huli" meaning "turn." The classic preparation involves turning chicken multiple times while grilling between two racks over a wood fire. My baked version captures those same sweet, tangy, and smoky flavors without requiring specialized equipment. Hawaiian locals typically serve this with white rice and macaroni salad for a true plate lunch experience.
Serving Suggestions
Transform this dish into a complete Hawaiian themed meal by serving the chicken over steamed white rice with a side of macaroni salad. The sauce soaks beautifully into the rice, and the cool creaminess of the salad perfectly complements the sweet and savory chicken. For a lighter option, serve with a pineapple slaw dressed with a rice vinegar dressing and topped with toasted macadamia nuts.
Frequently Asked Questions
- → Can I use chicken breasts instead of thighs?
Yes, you can use chicken breasts, but they may cook faster. Adjust the baking time to avoid drying out the meat.
- → How do I make the sauce thicker?
If the sauce isn’t thick enough, add a bit more cornstarch slurry (mix of cornstarch and water) and simmer until it reaches your desired consistency.
- → Is fresh pineapple necessary for this dish?
No, fresh pineapple is optional, but it adds a lovely garnish and enhances the presentation. Canned pineapple can also work in a pinch.
- → What sides pair well with this dish?
Steamed rice, roasted vegetables, or a fresh green salad are excellent pairings for this dish.
- → Can I prepare the sauce in advance?
Absolutely! The sauce can be prepared up to 2 days in advance. Store it in the refrigerator and reheat gently before using.