
 Pin it
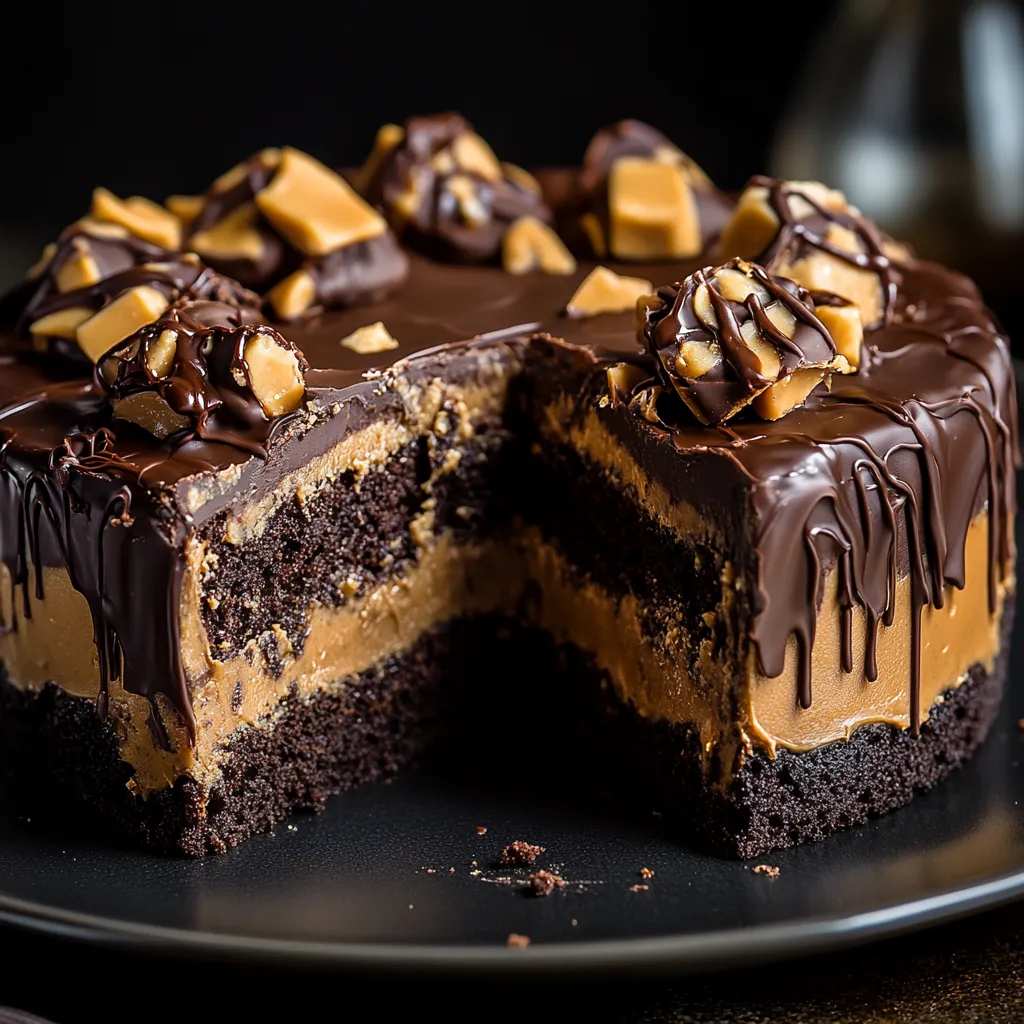
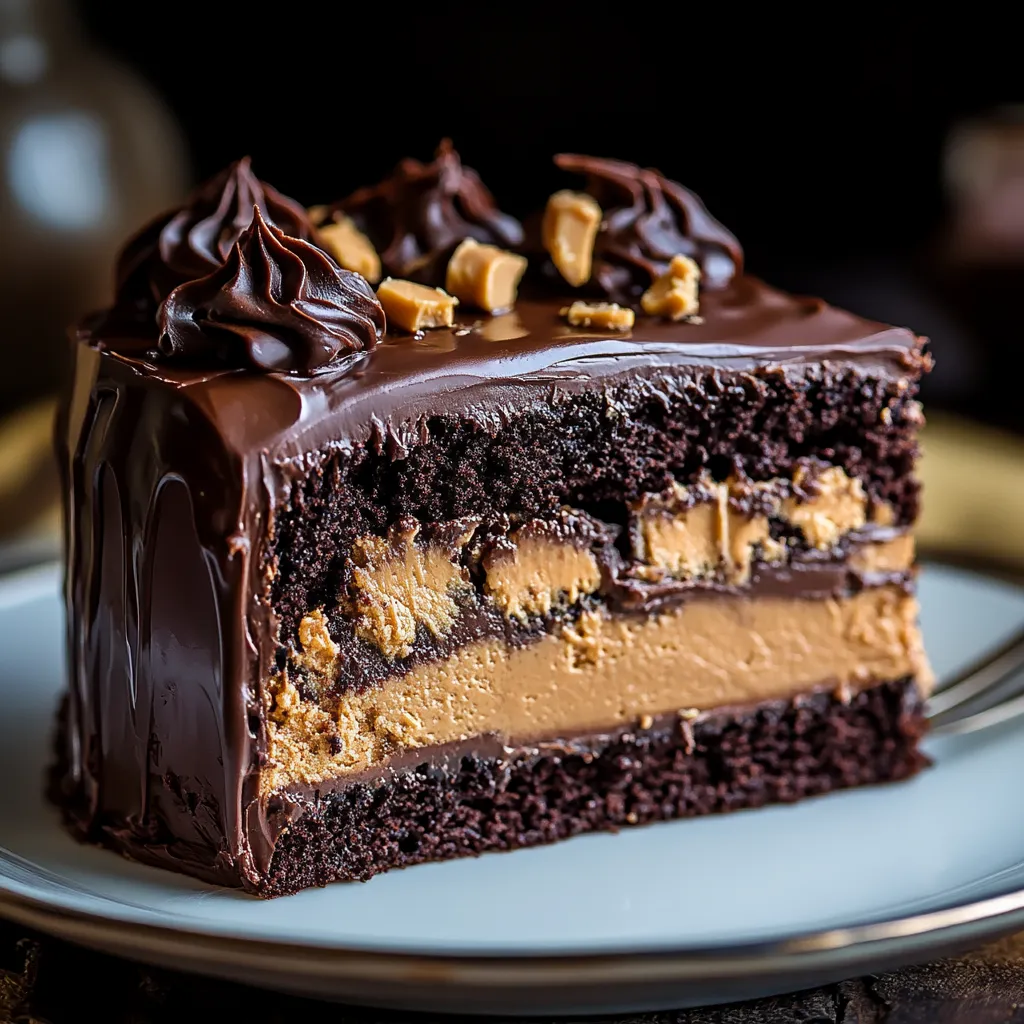
This chocolate peanut butter poke cake transforms a simple chocolate cake into a decadent dessert experience that will satisfy any sweet tooth craving. The combination of rich chocolate cake infused with creamy peanut butter creates an indulgent treat that's surprisingly easy to make but impressive enough for special occasions.
I first made this cake for my nephew's birthday when I needed something quick but impressive. The look on everyone's faces when they took their first bite convinced me this would become my signature dessert for gatherings.
Ingredients
- Chocolate cake mix: plus required ingredients allows you to focus on the flavors without measuring dry ingredients. Choose a moist devil's food variety for best results
- Creamy peanut butter: creates that silky filling that seeps into every hole. The natural oils help create the perfect consistency
- Sweetened condensed milk: adds incredible sweetness and moisture while helping the peanut butter mixture flow into the cake holes
- Chocolate fudge topping: provides a rich ganache like layer without any cooking. Look for premium brands for the best chocolate flavor
- Whipped topping: brings a light cloud like texture that balances the richness below. Use real whipped cream for special occasions
- Crushed peanut butter cups: add texture and visual appeal while reinforcing the flavor profile. Mini cups work best for even distribution
Step-by-Step Instructions
- Bake The Cake:
- Prepare and bake the chocolate cake according to package directions in a 9×13 inch pan. The exact temperature and timing will depend on your specific cake mix but typically around 350°F for 30 minutes. Test for doneness with a toothpick inserted in center that comes out mostly clean with a few moist crumbs.
- Create The Holes:
- While the cake is still warm but not hot from the oven use the handle end of a wooden spoon to poke holes all over the surface about 1 inch apart. Be sure to poke all the way to the bottom of the pan but avoid puncturing the bottom crust.
- Make The Filling:
- Combine the peanut butter and sweetened condensed milk in a microwave safe bowl and heat for 30 seconds. Stir until completely smooth and pourable. The warmth helps the mixture flow properly into all the holes you created.
- Fill The Cake:
- Pour the peanut butter mixture slowly over the entire surface of the warm cake ensuring it fills the holes. Use a spatula to gently spread and guide the mixture making sure it reaches every corner.
- Add Chocolate Layer:
- Warm the chocolate fudge topping slightly and spread it evenly over the peanut butter layer. This creates the distinct flavor layers that make this cake special.
- Chill And Set:
- Cover the cake with plastic wrap and refrigerate for at least 2 hours or overnight to allow all the flavors to meld together and the fillings to set properly.
- Finish And Garnish:
- Just before serving spread the thawed whipped topping in an even layer across the cake. Sprinkle generously with the crushed peanut butter cups for a beautiful presentation.
 Pin it
The peanut butter is truly the star ingredient in this recipe. My grandmother always said a quality peanut butter makes all the difference in baking. I remember watching her carefully select creamy varieties with minimal ingredients for the purest flavor.
Make It Even Better
For an extra special presentation try using a piping bag with a star tip to add decorative swirls of whipped topping around the edges of the cake. This simple technique elevates the homemade look to bakery quality without any special skills.
Storage Information
This cake stays fresh in the refrigerator for up to 4 days when covered properly. The texture actually improves after the first day as the fillings continue to soak into the cake creating an even more moist and flavorful result. Let it sit at room temperature for about 15 minutes before serving for the best texture and flavor experience.
Perfect Pairings
Serve slices with a scoop of vanilla ice cream for an over the top dessert experience. The cold creaminess of the ice cream against the rich cake creates a wonderful temperature and texture contrast. For a more formal presentation drizzle individual plates with chocolate sauce before adding the cake slice.
Flavor Variations
While the classic peanut butter version is irresistible you can customize this cake in countless ways. Try using Nutella instead of peanut butter for a hazelnut twist or swap the chocolate cake for vanilla to create a different flavor profile. White chocolate fudge topping can also replace the chocolate layer for a sweeter less intense version.
 Pin it
Frequently Asked Questions
- → How do I keep the cake moist?
The sweetened condensed milk mixture ensures the cake stays moist by seeping into the poked holes.
- → Can I use homemade chocolate cake instead of a box mix?
Yes, a homemade chocolate cake works perfectly and adds extra flavor to the dessert.
- → Can I substitute the peanut butter cups topping?
Yes, you can use chopped peanuts, chocolate chips, or additional drizzles of fudge for garnish.
- → How far in advance can I make this dessert?
The cake tastes better the next day after the flavors meld together, so preparing it a day ahead is ideal.
- → What’s the best way to serve this cake?
Serve this cake chilled with a spoon or spatula for easy portioning and to preserve its texture and flavor.