
 Pin it
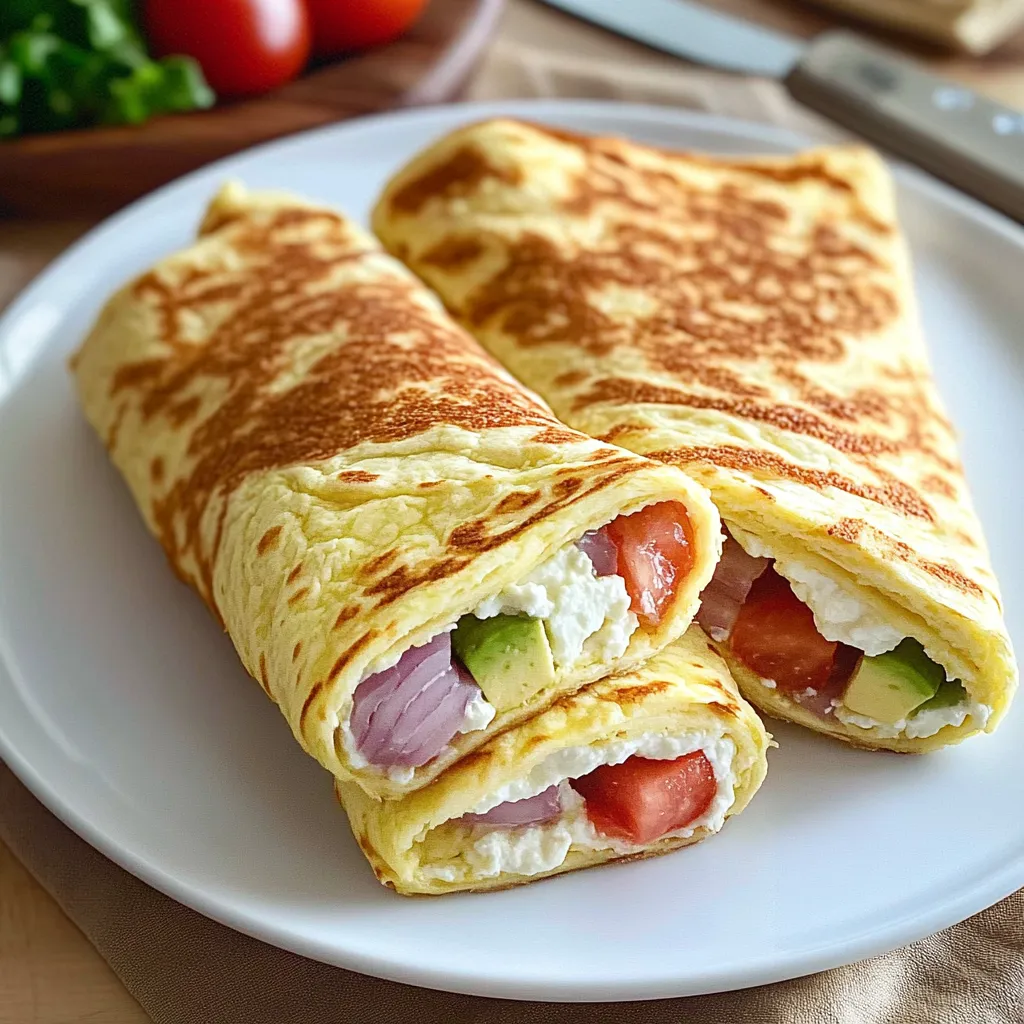
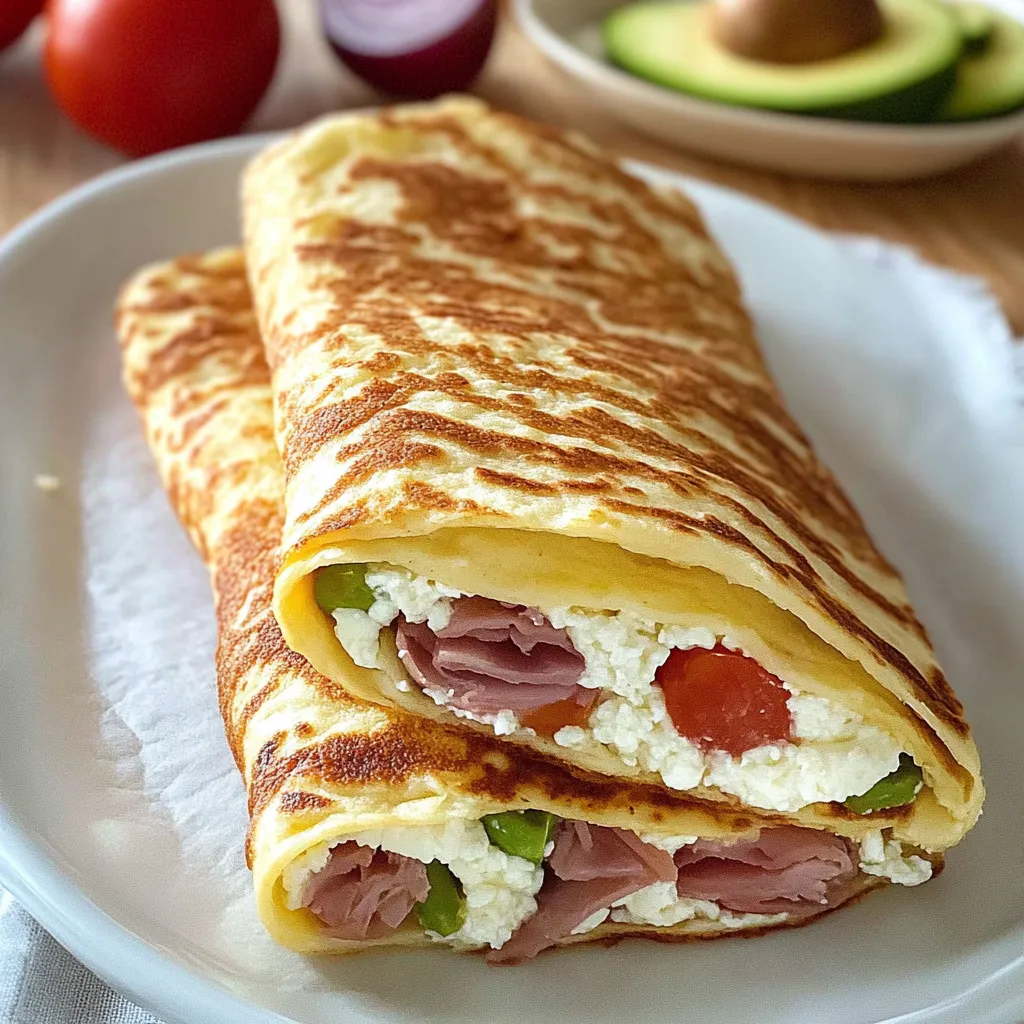
This cottage cheese wrap recipe transforms simple ingredients into a versatile, low-carb bread alternative that's perfect for any meal. After discovering how challenging it can be to find gluten-free wraps that actually hold together, I created this protein-packed version that's become my go-to solution for quick lunches and snacks.
I originally developed these wraps during a health reset when I was trying to reduce my carb intake without sacrificing sandwich enjoyment. Now they've become such a staple that my husband requests them weekly for his lunch box.
Ingredients
- 1 cup full-fat cottage cheese: provides the perfect protein base and creates a tender texture avoid low fat versions which can make the wraps dry
- 2 large eggs: act as the binding agent giving structure while adding more protein
- 4 tbsp grated Parmesan cheese: adds a savory depth and helps the edges crisp nicely choose freshly grated over pre-packaged for best flavor
- 1 tsp garlic powder: infuses aromatic flavor throughout the wrap without overwhelming
- 1 tsp Italian seasoning: brings herbal notes that complement virtually any filling
Step-by-Step Instructions
- Prepare Your Workspace:
- Preheat your oven to 350°F and line a large baking sheet with parchment paper ensuring it covers the entire surface with slight overhang for easy removal later. Having everything ready before mixing prevents the batter from sitting too long.
- Create Silky Batter:
- Combine cottage cheese, eggs, Parmesan, garlic powder, and Italian seasoning in a blender. Process for a full minute until completely smooth with no visible cottage cheese curds. The consistency should resemble a thick pancake batter that pours slowly but evenly.
- Form The Wrap Base:
- Pour the mixture onto your prepared tray and use a silicone spatula to spread it into an even, thin rectangle approximately 10x12 inches. Work from the center outward with gentle sweeping motions to maintain even thickness throughout. Take your time here as uniform thickness ensures even baking.
- Bake To Perfection:
- Place in the center rack of your preheated oven and bake for 30-35 minutes. You'll know it's done when the surface appears set and turns a light golden color with slightly darker edges. Different ovens vary, so watch closely after the 25-minute mark.
- Cool Completely:
- Allow the baked wrap to cool entirely on the tray without disturbing it. This cooling period is crucial as it allows the proteins to set firmly, creating a pliable yet sturdy texture that won't tear when handled. Plan for at least 15-20 minutes of cooling time.
- Prepare And Fill:
- Once cooled, carefully peel the wrap from the parchment paper and cut into two equal sections. Add your desired fillings to one half of each piece, then fold over the empty half to create your wrap. The texture will be slightly different from traditional flour wraps but strong enough to hold substantial fillings.
 Pin it
The Italian seasoning might seem like a small addition, but it's actually my secret weapon in this recipe. My grandmother always taught me that herbs elevate simple dishes, and these wraps prove her right every time. I once served these at a family gathering without telling anyone they were low-carb, and my bread-loving uncle asked for the recipe!
Storage And Make-Ahead Tips
These wraps actually improve with a bit of time in the refrigerator. After cooling completely, layer them between sheets of parchment paper and store in an airtight container for up to 3 days. You can even freeze them for up to a month—just thaw in the refrigerator overnight before using.
When reheating, a quick 10-second warming in the microwave or a few minutes in a dry skillet over low heat will restore their flexibility without making them tough. I find these wraps are perfect for meal prep Sundays, setting you up with grab-and-go lunch options all week long.
Troubleshooting Common Issues
The most frequent challenge with these wraps is getting the thickness right. If your wrap turns out too thin, it may become brittle when cooled. Conversely, if it's too thick, it can remain soft in the center and won't fold properly. Aim for about 1/8-inch thickness throughout for the perfect balance of flexibility and structure.
If your wrap sticks to the parchment paper despite cooling completely, try placing it in the refrigerator for 15 minutes, which often helps release it cleanly. And remember, tiny cracks are normal and won't affect the wrap's functionality—they'll be hidden once you add fillings and fold it.
Nutritional Benefits
Beyond being low in carbohydrates, these cottage cheese wraps deliver impressive nutritional benefits. The combination of eggs and cottage cheese creates a complete protein profile with all essential amino acids. They're naturally gluten-free and keto-friendly, making them suitable for various dietary needs.
The calcium content from both cottage cheese and Parmesan supports bone health, while the protein content helps maintain muscle mass and provides lasting satiety. Unlike many commercial low-carb alternatives, these wraps contain no artificial ingredients or preservatives—just wholesome, recognizable foods.
Frequently Asked Questions
- → Can I use reduced-fat cottage cheese?
Yes, but the wraps may not be as rich or firm. Full-fat cottage cheese provides the best texture and taste.
- → What other seasonings can I use?
Try paprika, onion powder, dried basil, or chili flakes to customize the flavor. Adjust to your preference.
- → Are these wraps gluten-free?
Yes, these wraps are naturally gluten-free as they don’t contain any flour or grains.
- → How do I prevent the mixture from sticking?
Ensure you line the baking sheet with parchment paper and let the wraps cool completely before peeling them off.
- → How should I store the leftover wraps?
Store unused wraps in an airtight container in the refrigerator for up to 3 days. Reheat or use them cold as preferred.
- → Can I freeze the wraps?
Yes, you can freeze the wraps. Stack them with parchment paper between each layer and store them in a freezer-safe bag. Thaw and reheat before use.