
 Pin it
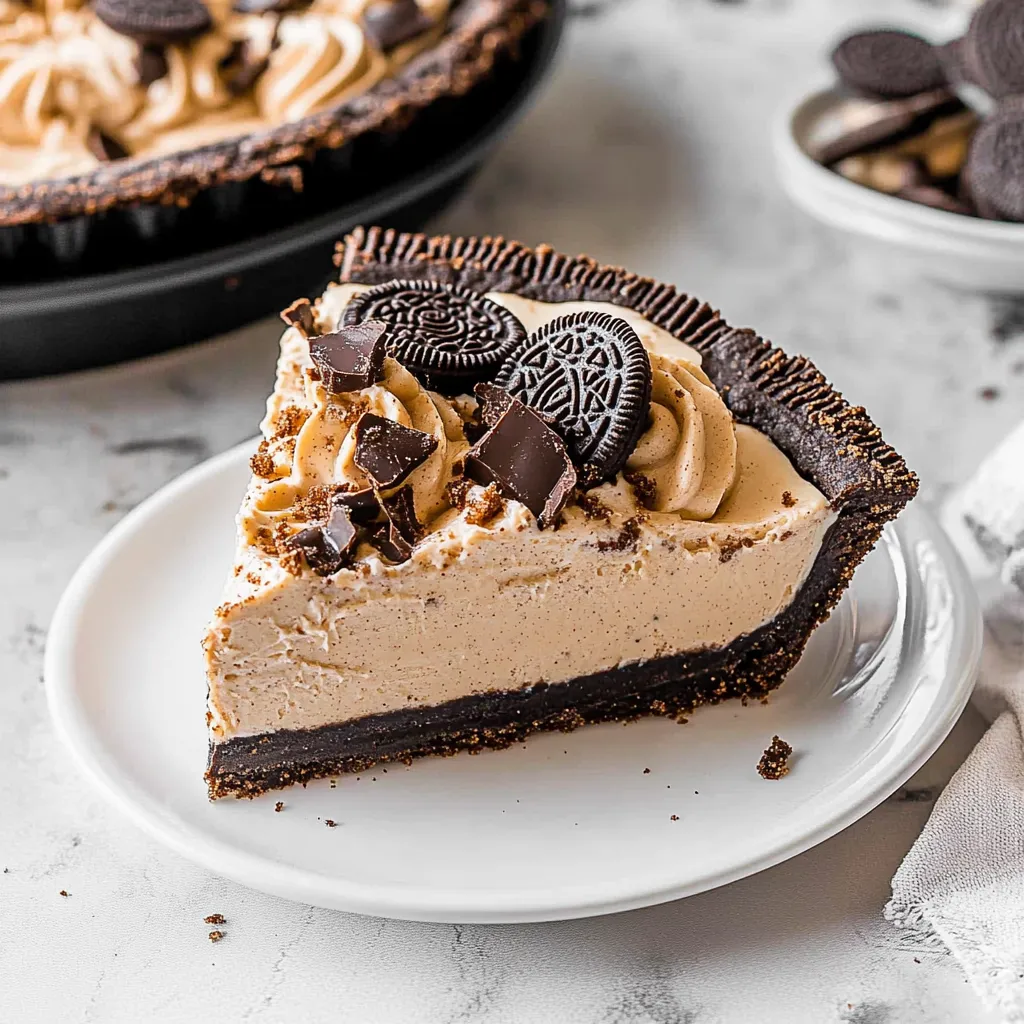
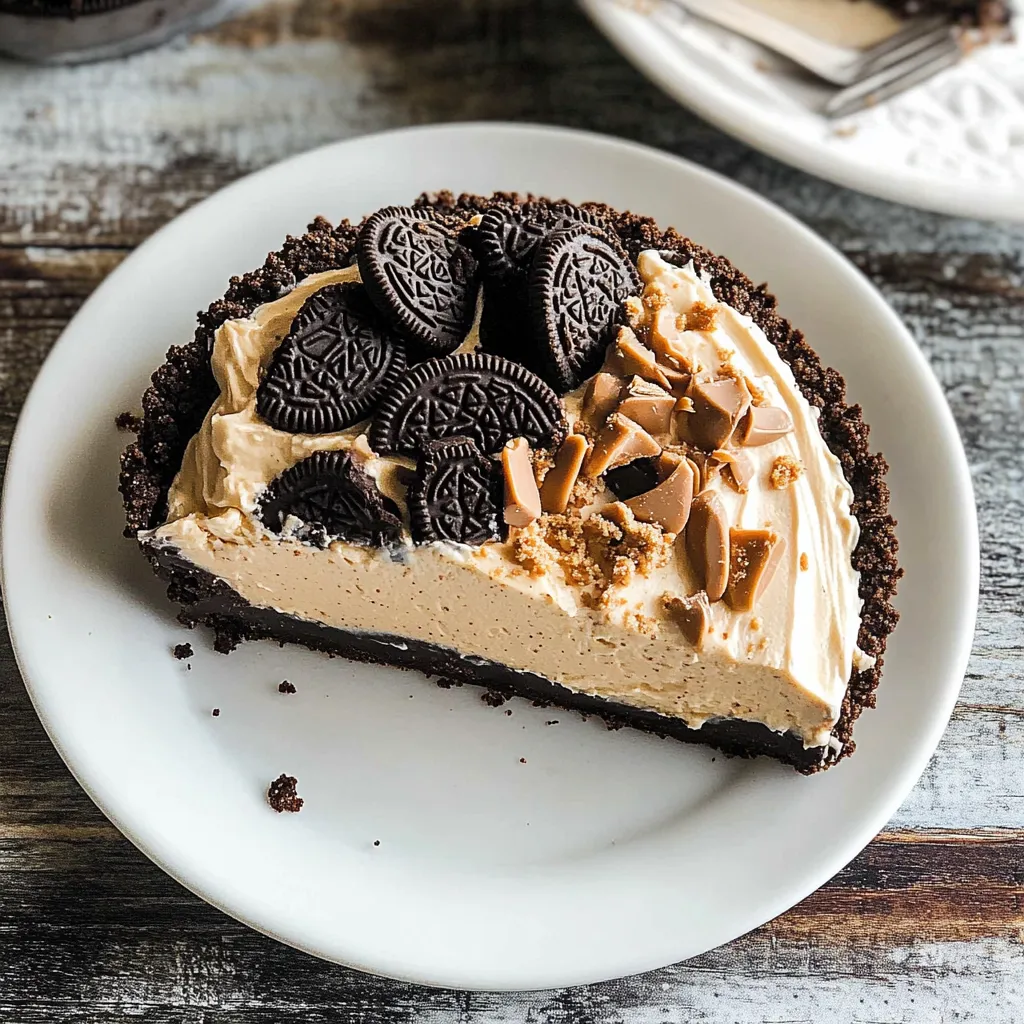
This Oreo Peanut Butter Pie has been my family's go-to dessert for birthday celebrations and special gatherings for years. The creamy peanut butter filling nestled in a chocolate cookie crust creates an irresistible combination that disappears within minutes at every party.
I first created this pie when looking for a no fuss dessert to bring to a summer barbecue. The host's teenage son ended up eating three slices and now requests it every time I visit!
Ingredients
- Oreo cookies: The classic chocolate sandwich cookies create the perfect crunchy foundation and deliver that distinctive cocoa flavor
- Unsalted butter: Binds the crust together while allowing you to control the saltiness
- Cream cheese: Provides tanginess and structure to balance the sweetness of the pie
- Creamy peanut butter: Choose a commercial brand like Jif or Skippy for the smoothest texture and best consistency
- Powdered sugar: Incorporates seamlessly without any grittiness
- Whipped topping: Creates lightness in the filling that regular whipped cream cannot match
- Vanilla extract: Adds depth to enhance both the chocolate and peanut butter flavors
- Optional toppings: Customize with Reese's cups, Reese's Pieces, or drizzles of chocolate and peanut butter
Step-by-Step Instructions
- Prepare the Oreo Crust:
- Process whole Oreos including the filling in your food processor until they become fine crumbs with no large chunks remaining. The filling actually helps bind the crust so there's no need to separate it. Pulse about 10 to 15 times then run continuously until finely ground.
- Mix the Crust:
- Combine the Oreo crumbs with melted butter, sugar, and salt in a bowl, stirring until every crumb is moistened. The mixture should resemble wet sand and hold together when pressed between your fingers. If it seems too dry, add an additional tablespoon of melted butter.
- Form the Crust:
- Transfer the crumb mixture to a 9-inch pie dish and press firmly against the bottom and up the sides using the bottom of a measuring cup. Apply even pressure to create a uniform thickness throughout. Press the edges with your fingers to create a clean finish.
- Bake the Crust:
- Place the crust in a preheated oven for exactly 10 minutes, no longer or it may become too brittle. Allow it to cool completely before filling, which takes about 30 minutes at room temperature or 15 minutes in the refrigerator.
- Make the Filling:
- Beat the cream cheese and peanut butter together until completely smooth with no lumps whatsoever. Start on low speed to prevent splatter, then increase to medium high. This step creates the foundation of your filling's texture.
- Sweeten the Mixture:
- Add powdered sugar gradually while continuing to beat, incorporating completely before adding more. This prevents lumps and ensures even sweetness throughout the filling. The mixture will become slightly thicker at this stage.
- Create the Final Filling:
- Gently fold in the whipped topping and vanilla using a rubber spatula with a light hand. Use a cutting and folding motion rather than stirring to maintain as much air as possible in the mixture, which creates the pie's signature fluffy texture.
- Assemble and Chill:
- Spread the filling into the cooled crust creating decorative swirls with an offset spatula if desired. Freeze for at least one hour, which sets the filling perfectly for clean slices. For longer storage, refrigerate after the initial freeze.
 Pin it
The secret to this pie's incredible texture is the combination of cream cheese and whipped topping. I discovered this by accident when I ran out of heavy cream one day and used whipped topping instead. The result was so much more stable and creamy that I never went back to the original recipe!
Freezer Storage Tips
This pie freezes beautifully for up to one month when wrapped properly. After the initial chilling, wrap individual slices in plastic wrap then aluminum foil and store in a freezer bag. This triple wrapping method prevents freezer burn and preserves the flavor. Thaw individual slices in the refrigerator for about 30 minutes before serving.
Smart Substitutions
If you're looking for alternatives, there are several options that work wonderfully. Graham crackers can replace Oreos for the crust, just increase the butter to 6 tablespoons. Almond butter or cookie butter can substitute for peanut butter, creating unique flavor variations. For a lighter version, use Neufchâtel cheese instead of regular cream cheese and light whipped topping to save about 100 calories per slice without sacrificing much flavor.
Serving Suggestions
While this pie is perfectly delicious on its own, a few accompaniments can elevate it even further. A drizzle of warm chocolate ganache just before serving adds visual appeal and another layer of flavor. Fresh berries, particularly raspberries or strawberries, provide a tart contrast to the rich filling. For an ice cream parlor experience, serve with a scoop of vanilla ice cream and hot fudge sauce.
The History Behind the Flavor Combo
The peanut butter and chocolate combination became an American sensation after H.B. Reese, a former dairy farmer for Milton Hershey, created Reese's Peanut Butter Cups in the 1920s. This pie honors that classic flavor pairing that has become deeply embedded in American dessert culture. What started as a candy has evolved into countless dessert variations with this pie being one of the most beloved.
Frequently Asked Questions
- → How do I make the Oreo crust?
To make the crust, blend 25 Oreo cookies into crumbs, mix with melted butter, sugar, and a pinch of salt, then press into a 9-inch pie dish and bake at 350°F for 10 minutes.
- → Can I use natural peanut butter for the filling?
It’s best to use creamy, processed peanut butter for a smoother consistency. Natural peanut butter might separate and affect the texture.
- → How long should I chill the pie?
Chill the pie in the freezer for at least one hour for the filling to set properly. Serve directly from the freezer for best results.
- → What toppings pair well with this pie?
Melted peanut butter, melted chocolate, Reese’s cups, or Reese’s pieces all make excellent toppings for added flavor and presentation.
- → Can I prepare this pie in advance?
Yes, you can prepare the pie up to 2 days in advance and keep it covered in the freezer until ready to serve.